Brussels sprouts, with their unique cabbage-like flavor, are a cool-season vegetable prized for their nutritional value and versatility in the kitchen. Knowing the right time and techniques for harvesting ensures you enjoy these delicious sprouts at their peak.
Understanding Brussels Sprout Growth and Maturation
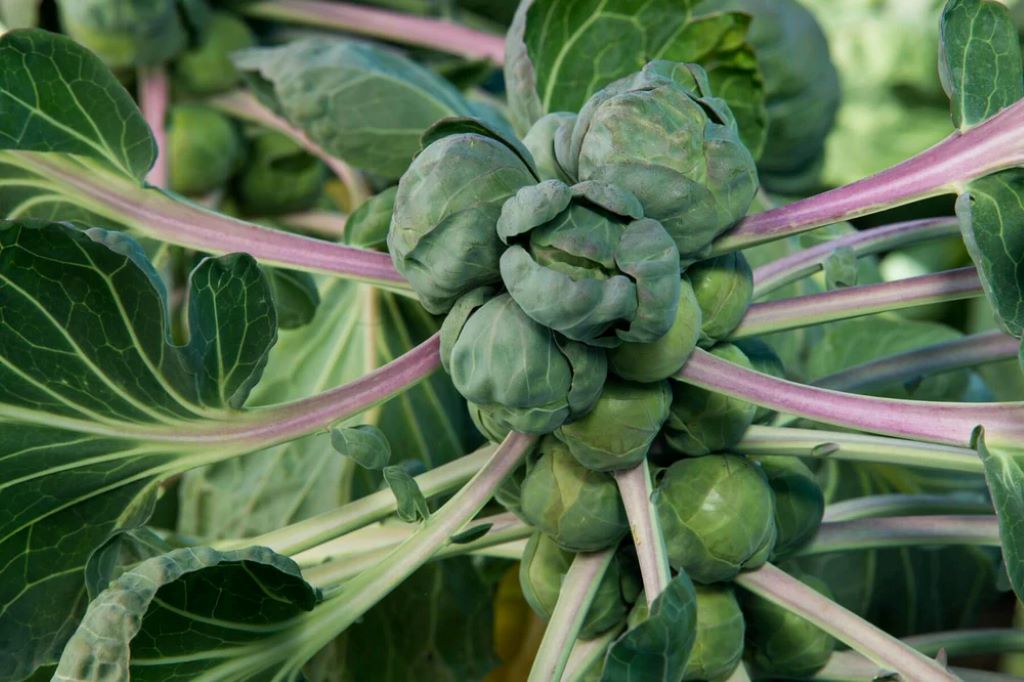
Brussels sprouts are not actually miniature cabbages, but buds that form along the plant’s tall, thick stalk. They grow in a spiral pattern, maturing from the bottom up. A healthy plant can produce dozens of sprouts over several weeks or months. If you’re also interested in learning how to harvest willow cuttings, you can find detailed instructions at: https://hatchettgardendesign.com/plants/how-to-plant-willow-cuttings/.
When to Harvest:
- Size: Sprouts are typically ready when they reach the size of a walnut or golf ball (about 1-1.5 inches in diameter).
- Firmness: Gently squeeze the sprout. It should feel firm and compact. Avoid harvesting if they feel soft or squishy.
- Color: Look for a bright green color. As they mature, they might develop a slight yellow tinge, but avoid those that are fully yellow or browning.
- Leaf Cover: The outer leaves of the sprout should be tightly wrapped around the bud. Loose or open leaves are a sign of over-maturity.
Related: How Fast Growing Are Avocado Trees?
Harvesting Methods
There are two main ways to harvest brussel sprouts:
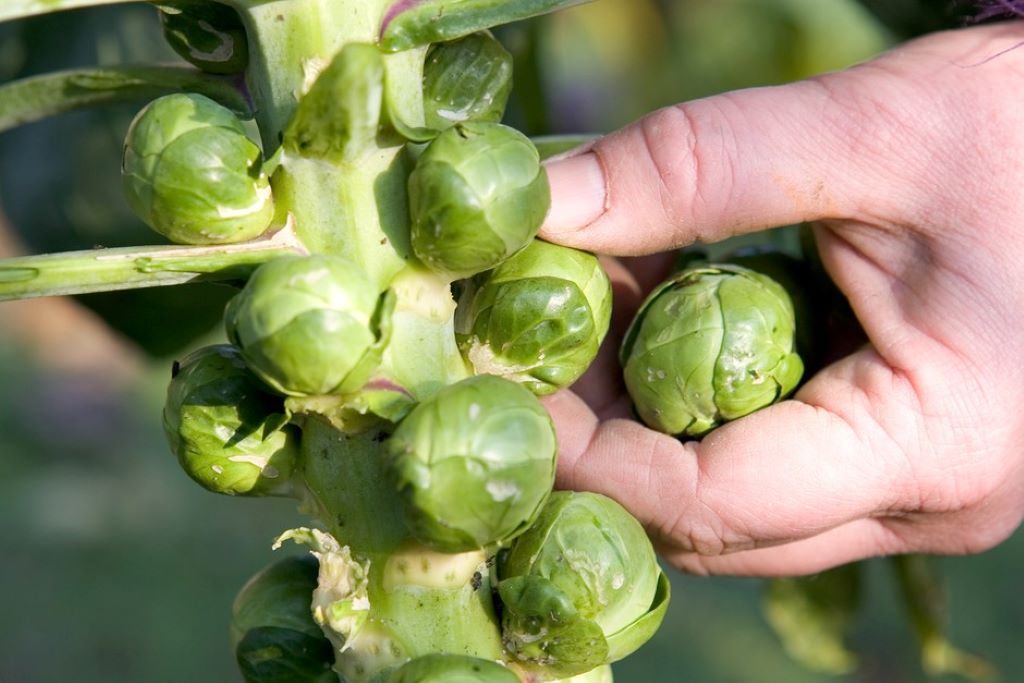
1. Individual Harvesting
This method involves harvesting sprouts as they reach maturity.
- Start at the Bottom: Begin harvesting the lowest sprouts on the stalk first.
- Twist and Pull: Grasp a sprout firmly between your thumb and forefinger and twist it gently until it snaps off the stalk. You can also use a sharp knife to cut them off at the base.
- Remove Leaves: As you harvest, remove any yellowing or damaged leaves below the sprout. This encourages upward growth and new sprout production.
- Continue Harvesting: Check your plants regularly (every few days) and harvest as new sprouts reach the ideal size and firmness.
2. Whole Stalk Harvesting
If you have a large number of sprouts maturing at once, or if a hard frost is approaching, you can harvest the entire stalk.
- Cut the Stalk: Use a sharp knife or pruning shears to cut the stalk at the base, near the ground.
- Remove Leaves: Strip away the leaves from the stalk.
- Store: The whole stalk can be stored in a cool, dark place for several weeks, allowing you to harvest sprouts as needed.
Additional Tips and Tricks
- Topping: Some gardeners top the plant (remove the top few inches of the main stem) about a month before the first expected frost. This redirects the plant’s energy to maturing the existing sprouts.
- Frost Sweetening: Brussels sprouts often develop a sweeter flavor after exposure to frost. If you live in an area with mild winters, consider leaving some sprouts on the plant to experience a frost or two.
- Succession Planting: For a continuous harvest, plant brussel sprouts in succession, starting seeds or transplants every few weeks.
- Storing Harvested Sprouts: Store harvested sprouts in a perforated plastic bag in the refrigerator. They should keep for up to two weeks.
Troubleshooting Common Issues
- Loose Sprouts: If sprouts are loose or fall off the stalk easily, they may be overripe. Harvest them immediately, even if they are smaller than usual.
- Bitter Flavor: Overly mature sprouts or those stressed by drought or heat can develop a bitter taste. Harvest promptly and provide consistent moisture to your plants.
- Pest Damage: Check for signs of insect damage, such as holes in the leaves or sprouts. Remove affected sprouts and apply appropriate pest control measures if necessary.
Enjoy Your Harvest!
By following these tips and techniques, you’ll be able to harvest a bountiful crop of delicious, homegrown Brussel sprouts. Experiment with different recipes and enjoy the fruits of your labor throughout the season.