Are you installing a new door or replacing an old one in your home? Framing a door opening correctly is an essential part of the process. An adequately prepared door opening will provide stability, increase durability, and improve functionality. Whether you’re a DIYer tackling your first door installation or a seasoned pro, following some basic guidelines will ensure success.
Gather the Right Materials

Before getting started, you’ll need to gather the appropriate supplies. Here’s what you’ll need:
- Wood boards or studs for framing. The most common sizes are 2x4s or 2x6s.
- Wood screws or nails for assembling the frame. Make sure to use galvanized or stainless steel.
- Wood shims for leveling and securing the frame. Go with cedar or pine for durability.
- Wood putty for filling holes and imperfections. Pick a putty that matches your wood color.
- Tools like a circular saw, drill, hammer, tape measure, level, and carpenter’s square. Safety gear like glasses and gloves is also a must.
With the suitable materials in hand, you’re ready to start framing. Begin by carefully measuring and marking the locations for your vertical studs. These studs will provide the structural support for your walls. Pay close attention to any signs of wear or damage, such as a vertical crack above the door frame. Addressing these issues early in the framing process ensures a solid foundation for your project. Once the measurements are precise and the potential concerns are addressed, proceed confidently to assemble the frame to define the structure.
Measure and Mark the Opening
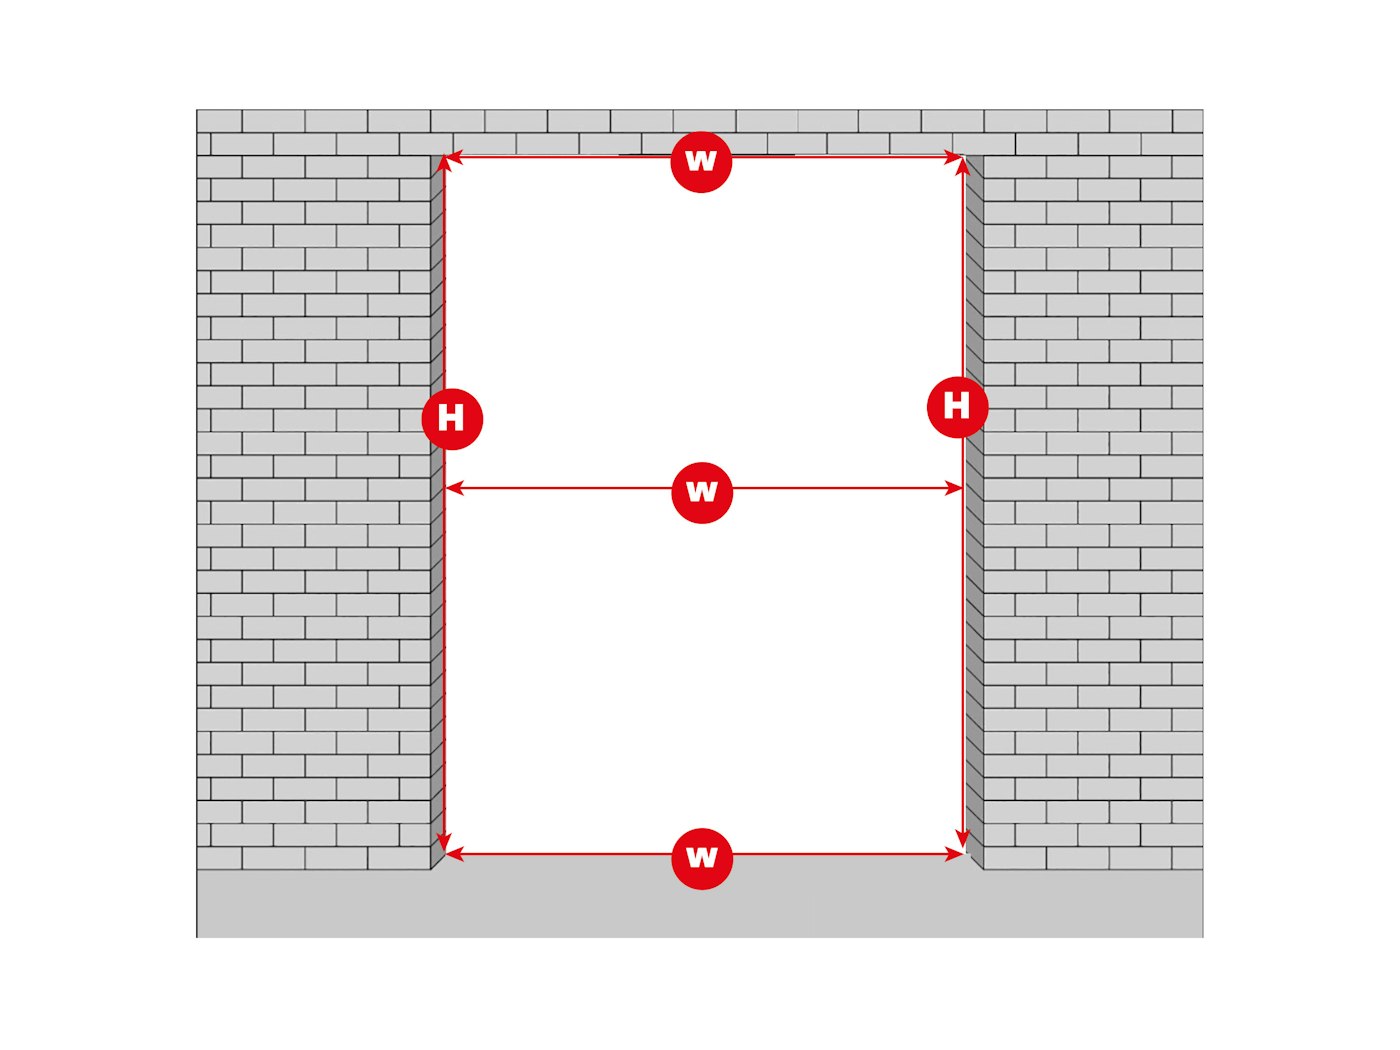
First up is measuring and marking the size of the rough opening. This is the actual frame size that your door will fit into.
- The rough opening is usually 1/2″ wider and 1/2″ taller than the actual door size for standard interior doors. For example, a 30″ x 80″ door would need a 30 1/2″ x 80 1/2″ rough opening.
- Use a tape measure to measure the existing opening size or mark a new opening on the floor and walls. Use a pencil to keep the full rough opening size.
- You want the opening to be plumb and level. Use a 4′ level and carpenter’s square to ensure your marks are spot on.
Measure twice and mark once for accuracy here. An uneven or out-of-square opening will make installing the door much harder.
Cut the Frame Members
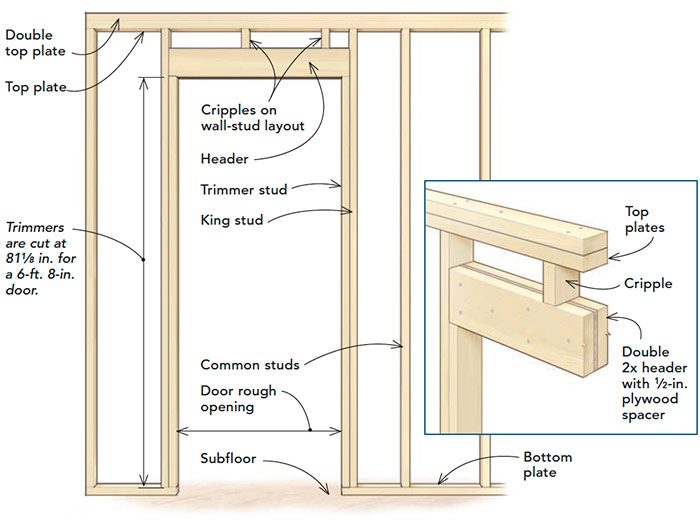
With your measurements marked, it’s time to cut the wood frame pieces to size. You’ll need two vertical studs, a header piece, and a sill plate for the top and bottom.
- Cut the side studs 1/2″ longer than the rough opening height. So for an 80 1/2″ opening, cut 81″ studs.
- Size the header and sill plates to the exact width of the rough opening. A 30 1/2″ opening needs 30 1/2″ pieces.
- Use a circular saw and carefully follow your marked cut lines. Wear safety glasses and watch your fingers!
Having each frame piece pre-cut to the correct size will streamline the assembly process.
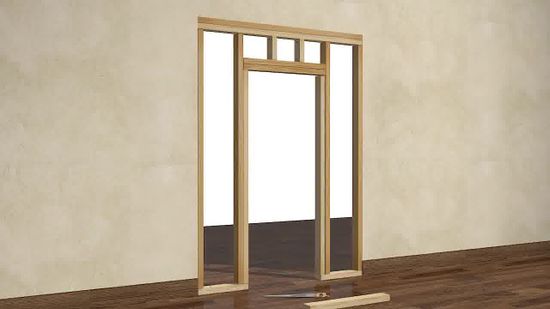
Assemble and Install the Frame
Now it’s time for the fun part – putting the pieces together to create your door frame. Follow these steps:
- Lay the bottom sill plate down first. Make sure it’s level using a 4′ level.
- Attach one of the studs vertically to the sill plate. Use 2 1/2″ screws or nails every 12-16 inches.
- Install the top header next. Check for level again.
- Add the second stud to complete the square frame.
- Use shims, if needed, between the framing and floor/wall to plumb and level the studs—secure shims with screws.
- Check all corners with a carpenter’s square to ensure the frame is square. Adjust as needed.
A lovely square opening will prevent issues with the door hanging and operating correctly down the line.
Finish the Frame
With the door framed up, finish things off with these steps:
- Cut any extra length off the vertical studs so they are flush with the top of the header.
- Use wood putty to fill any holes or imperfections in the wood. Let dry completely.
- Sand any dried putty smooth and flush with the surrounding wood.
- Install weatherstripping around the frame to seal air gaps when the door is installed.
- Give the wood framing two coats of primer to protect it from moisture.
And that’s it – you now have a solid door frame ready for the door itself to be installed. Pat yourself on the back for a job well done!
FAQs
What size lumber should I use to frame a door?
- For interior doors, 2×4 studs are sufficient for most standard door sizes. Go with 2×6 studs for wider openings or exterior doors.
What is the standard height and width for a door frame?
- Most interior doors are 80″ high x 30″ or 36” wide. Standard rough openings are 80 1⁄2” x 30 1⁄2” or 36 1⁄2”.
How much space should be between the door frame and the rough opening?
- Leave a 1/2″ gap between the door frame and the rough opening. This allows room for shims, weatherstripping, and square adjustments.
Should the door frame be flush with the wall surface?
- No, recess the door frame about 1/2″ to 3/4″ from the wall surface. This creates space for casing trim to be added around the jamb later.
What is the best way to anchor the door frame to the floor?
- Use galvanized screws or concrete nails to secure the bottom sill plate directly into the subfloor. Anchoring it well prevents movement.
Conclusion
Installing doors starts with constructing a proper frame opening. Basic measuring, cutting, and assembly steps will set you up for success. Use quality materials, work carefully, and double-check for plumb, level, and square. Framing a door might take some time and elbow grease, but it’s a DIY-friendly project with the right know-how. Choosing the perfect adornment for the living room window, whether it be elegant drapes or sun-kissed plants, enhances the overall ambiance, and the sense of accomplishment when that new door operates smoothly is worth the effort, creating a harmonious and welcoming space.