A garage door is one of the most used entrances to a home, so keeping it in good working order is essential. The torsion spring system provides the power to open and close the door while the cables attach to the bottom corners and lift the door. If the spring or cable becomes damaged, the door may get stuck, become difficult to open, or slam shut unexpectedly. Replacing these components requires some mechanical skill and the right tools, but it is a project a homeowner can tackle themselves. In this guide, I’ll walk you through the steps to repair the torsion spring on the garage door and replace the cable.
Safety Precautions
Working with garage door springs can be dangerous if proper precautions are not taken. The torsion spring is under extreme tension and can cause severe injury if it lets go while being handled. Here are some essential safety tips:
- Use appropriate protective gear – safety goggles, gloves, long sleeves/pants. The spring coils could break and fly off with force.
- Make sure the door is entirely closed before beginning work. This keeps tension off the spring.
- Secure the door in the down position with vise clamps or C-clamps so it cannot be lifted until the spring is re-secured.
- Follow instructions carefully, and do not take shortcuts. Rushing can lead to mistakes.
- Have another adult present to assist with the job.
- Know your physical limits, and do not overexert yourself. Get help for huge, heavy doors.
- Call a professional if you do not understand the principles involved. Improper winding of springs can be hazardous.
Taking these precautions will help ensure you can replace parts safely. Refer to the manufacturer’s instructions as well for any model-specific guidance.
Replacing Torsion Springs
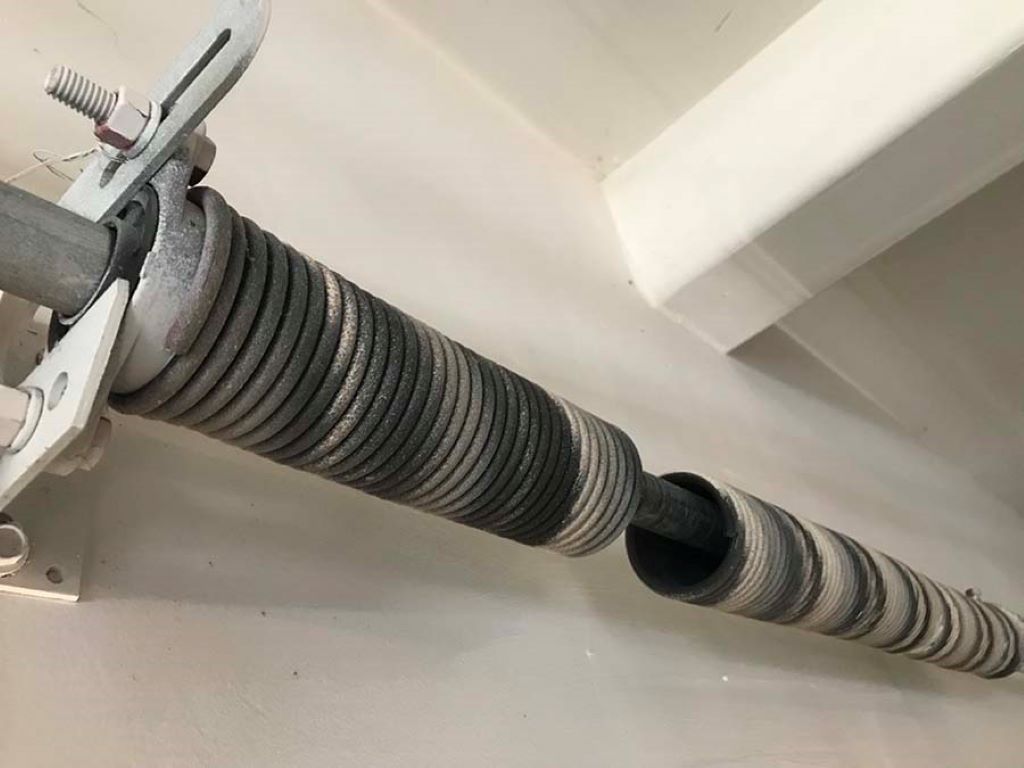
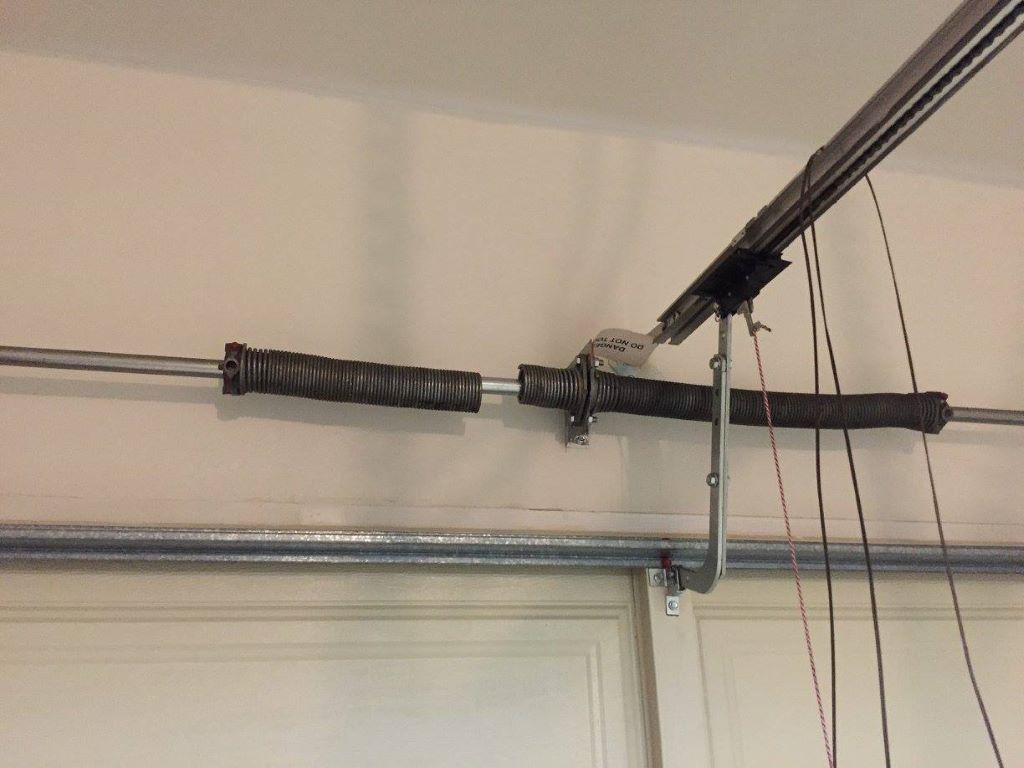
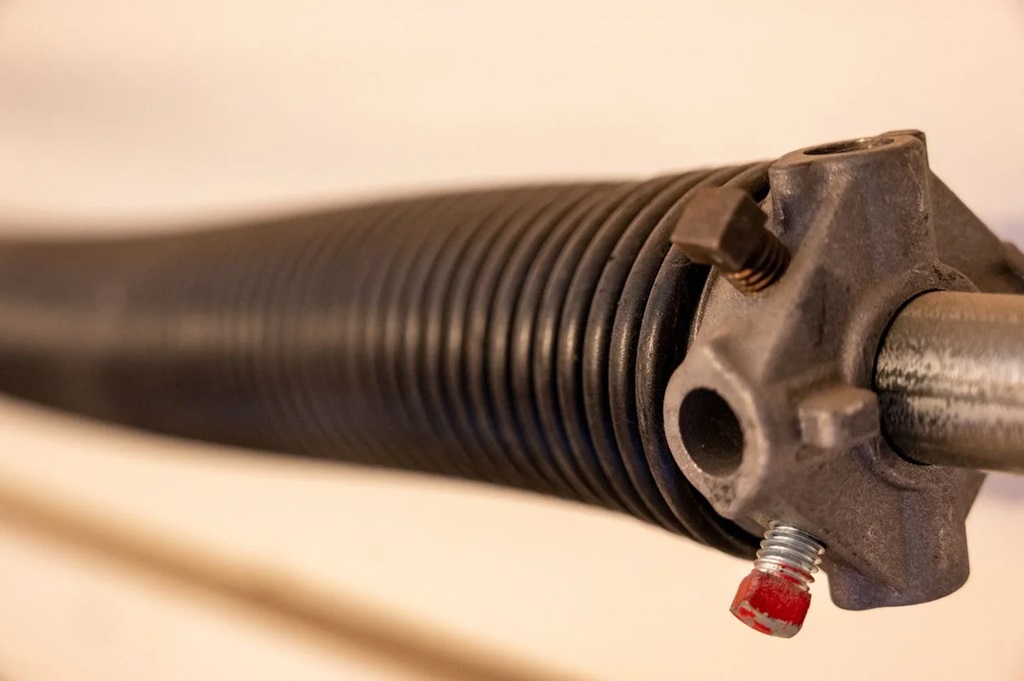
Torsion springs mount to a bar above the garage door opening. The spring is wound tight, and the tension lifts the door via cables. If a spring breaks, the door will be very difficult or impossible to open manually. To replace the torsion spring:
Materials Needed
- New torsion spring that matches the size of your existing one
- 6″ vise clamps or C-clamps
- Ladder
- Tape measure
- Adjustable wrench
- Winding bars
- 18″ pipe wrench (for tightening spring cones)
- Drill with 7/16″ socket bit
- Marker
Step 1: Prepare the Work Area
Sweep the floor and use cardboard to cover any glass windows that could shatter if the spring broke loose. Have your helper ready.
Step 2: Secure the Door
Close the door entirely. Place clamp devices above each bottom corner bracket to prevent the door from being lifted during work.
Step 3: Measure the Old Spring
Determine the length of the old spring. Measure the diameter of the coils and length from end to end. This info is needed to buy a replacement.
Step 4: Examine the Winding Cone
The winding cone may have loosened from the torsion shaft and slipped out of place. If so, slide it back into position and tighten the set screws with an Allen wrench.
Step 5: Remove the Old Spring
Stand safely aside and use winding bars inserted into holes on the winding cone to unwind the old spring, allowing the tension to release slowly. Unhook it from the frame once it is fully developed.
Step 6: Install the New Spring
Slide the new spring into place on the torsion bar. Make sure it matches the old one in diameter and length. Hook it to the frame as the old one was attached.
Step 7: Wind the Spring
Insert winding bars into the winding cone holes. Pulling the bar upward, begin incorporating the spring clockwise. Refer to the door’s documentation for the ideal number of winding rotations. Do not over-wind.
Step 8: Tighten the Cone
Lock the winding cone on the torsion shaft using a pipe wrench. Tighten the set screws fully.
Step 9: Test the Tension and Balance
Raise the door halfway up. If it stays in place, unwind the spring another quarter turn. The door should now stay suspended when let go. Fine-tune the tension as needed.
Step 10: Label the Winding Information
Note the number of spring turns on the winding cone with a marker. This info prevents over-winding next time.
Once the torsion spring is replaced, lubricate the spring and re-attach any safety containment cables that limit loose coils if the spring breaks. Test that the door opens and closes appropriately and adjust any needed tension.
Replacing Garage Door Cables
Cables on either side of the door lift it via the pulley system when the torsion spring turns. If a cable is frayed or broken, that door corner will sag. Replacing the cable requires the following steps:
Materials Needed
- New cable long enough to extend from bottom roller to pulley
- Ladder
- Vise clamps or C-clamps
- Wire cutters
- Needle nose pliers
- Adjustable wrench
- Marker
Step 1: Prep the Work Area
Clear debris and sweep the floor. Cover nearby windows with cardboard. Have your helper ready.
Step 2: Secure the Door
Fully close the door. Place clamps on the bottom brackets so the door cannot be raised.
Step 3: Examine the Pulley System
Note how the intact cable routes through the pulley system and over the torsion spring. The new cable will follow the same path.
Step 4: Cut the Broken Cable
Stand safely aside and use wire cutters to detach the crimped ends of the broken cable from the bottom roller and pulley.
Step 5: Thread the New Cable
Feed the new cable through the pulley, over the torsion spring, and back down through the pulley system. Leave plenty of slack.
Step 6: Crimp the Ends
Attach both ends of the new cable using vice grips or needle nose pliers. Adhere to the manufacturer’s guidance.
Step 7: Tighten and Test
Lift the door halfway up and tighten the cable by pulling it taut using pliers. Fine-tune the tension so the door is balanced—test operation.
Step 8: Secure the Cable
Once tension is correct, firmly crimp the cable ends with pliers to attach to the roller and pulley permanently.
Be sure to lubricate the pulley system with garage door lubricant spray after replacing the cable. Watch during the initial operation to ensure the cable stays taut and does not slip. With torsion springs and cables replaced, the garage door will open and close quickly again.
FAQs
How can I get new garage door parts?
Garage door parts like springs and cables are commonly available at hardware stores and home improvement centers. Bring the old part to find an exact match. You can also check manufacturer websites for parts lookup.
What if I can’t balance the garage door myself?
Call a garage door technician if you cannot get the door balanced adequately after replacing parts. Improper spring tension can cause the door to malfunction or result in damage.
What size torsion spring do I need?
Carefully measure the length and diameter of the spring coils on your existing spring. Count the number of coils. This info ensures you get an identical replacement spring.
How do I know if I wound the torsion spring correctly?
Refer to the manufacturer’s documentation for the ideal number of turns to wind the spring. Mark the winding cone once set so you have a reference for next time.
Why does my new cable keep slipping?
Be sure the cable ends are firmly crimped with vice grips or pliers and that the cable is pulled taut. Lubricate the pulley system regularly to prevent slipping and fraying.
Conclusion
Replacing a broken torsion spring or damaged lift cable is one of the more challenging DIY garage door repairs. But with good preparation, the proper tools, and adherence to safety procedures, a homeowner can certainly tackle it. When it comes to programming a garage door opener, the key things to remember are taking precautions, accurately measuring parts to find replacements, double-checking the door balance, and securely fastening all components. With some mechanical aptitude and patience, you can get your stubborn garage door working smoothly again after replacing these essential parts. Just take it slow and steady.