







Sealing gaps around your bathroom, windows, or baseboards requires patience. The question everyone asks is simple: when can I actually use this space again? Understanding drying times saves you from ruining fresh work and helps you plan your day effectively.
Different sealant types behave uniquely. Silicone resists water beautifully but demands more waiting time. Acrylic latex dries faster yet struggles in damp environments. Your choice depends on where you’re working and how quickly you need results.
If you’re wondering how long does it take for caulk to dry, the answer ranges from 30 minutes to several weeks depending on the formula. Surface drying happens relatively quickly, but complete curing takes considerably longer. Temperature, humidity, and application thickness all influence these timelines significantly.
This guide breaks down specific timeframes for each sealant variety, explains what affects drying speed, and shares practical methods to finish your project faster. Whether you’re tackling a weekend bathroom refresh or a quick repair job, you’ll know exactly when your work is ready for action.
What Makes Drying Different From Curing?
These terms sound similar but describe separate processes. Drying refers to the surface becoming touch-dry, firm enough that you won’t leave fingerprints. Curing means the material has completed its chemical transformation and reached full strength.
When sealant dries, solvents evaporate from the exposed surface. This typically happens within 30 minutes to a few hours. The material feels solid on top, but underneath remains soft and vulnerable. Touching it too soon creates dents and imperfections.
Curing involves deeper chemical reactions that continue for days or weeks. Silicone might need three weeks to achieve maximum flexibility and adhesion. Acrylic versions finish faster, usually within seven days. Until this process completes, the seal can’t handle its intended stress levels.
Think of it like baking a cake. The surface might look done after 20 minutes, but cutting into it reveals raw batter underneath. Similarly, dried sealant needs time for internal hardening. Rushing either process guarantees disappointing results.
Knowing this distinction helps set realistic expectations. You can walk carefully near the area once dry, but avoid water exposure or heavy contact until curing finishes. Patience during this stage determines whether your seal lasts months or years.
How Quickly Does Silicone Caulk Dry?
Silicone dominates bathroom and kitchen projects because water can’t penetrate it. The surface typically becomes touch-dry within 30 to 60 minutes under normal conditions. Light finger pressure won’t damage it after this initial period.
However, full curing demands significantly more time. Most manufacturers specify waiting 24 hours before exposing silicone to water. Complete hardening throughout the entire bead takes seven to 21 days depending on thickness and environment. Thicker applications need extra time because interior portions cure more slowly.
Temperature plays a major role in silicone performance. Warm spaces between 70 and 80 degrees Fahrenheit accelerate the process noticeably. Cold environments below 50 degrees can triple drying times or prevent proper curing altogether. Therefore, winter projects require extra planning.
Interestingly, humidity actually helps silicone. This formula relies on atmospheric moisture to complete its chemical reaction. Dry climates can slow curing, while moderate humidity speeds it up. This makes silicone ideal for bathrooms where moisture is constant.
Planning matters here. If you’re sealing a shower, arrange to use another bathroom for at least 24 hours. For kitchen sinks, avoid running water directly on the fresh seal for a full day. This patience prevents premature failure and maximizes longevity.
What About Acrylic Latex Caulk Drying Time?
Acrylic latex formulas work wonderfully for interior projects with minimal moisture exposure. These sealants dry noticeably faster than silicone alternatives. Surface drying occurs in roughly 30 minutes under favorable conditions. Additionally, you can paint over them within one to two hours.
Complete curing happens much quicker compared to silicone. Most acrylic latex products reach full strength within 24 hours. Some fast-dry versions claim readiness in just three hours, though overnight waiting remains the safest approach for maximum durability.
These formulas prefer dry conditions. Unlike silicone, excess humidity slows acrylic latex drying significantly. They perform best in climate-controlled indoor spaces with moderate temperatures. Applying them in damp basements or during humid weather extends drying periods considerably.
Another advantage is easy cleanup. Acrylic latex washes away with water before it dries, making it beginner-friendly. However, it lacks silicone’s flexibility and water resistance. This makes it unsuitable for areas with constant moisture like shower enclosures.
For trim work, window frames, and baseboards, acrylic latex excels. The quick drying time means you can complete painting on the same day. Just ensure the room stays dry and warm for best results.
Which Factors Control Caulk Drying Speed?
Several variables determine how quickly your sealant sets. Temperature ranks as the most influential factor. Most products perform optimally between 60 and 80 degrees Fahrenheit. Temperatures below 40 degrees can halt curing completely, leaving you with sticky, useless material.
Humidity creates opposite effects depending on the formula type. Silicone actually cures faster in humid conditions because it needs atmospheric moisture for its chemical reaction. Conversely, acrylic latex and polyurethane versions prefer drier air since excess moisture interferes with solvent evaporation.
Application thickness matters tremendously. A thin, properly tooled bead dries much faster than a thick glob. When you squeeze out excessive material, the surface might feel dry while the interior remains liquid. This creates a weak seal prone to cracking and separation.
Ventilation plays a supporting role in the process. Good airflow helps solvents evaporate more quickly, especially for acrylic formulas. Opening windows or running fans accelerates surface drying without harming the final result. However, avoid creating drafts so strong they deposit dust onto the wet surface.
Surface preparation affects both adhesion and drying time. Clean, dry surfaces allow sealants to bond properly and cure on schedule. Dirty or damp substrates extend drying times and compromise long-term performance. According to Family Handyman, proper preparation accounts for half of a successful caulking job.
Can You Make Caulk Dry Faster?
While you can’t rush the fundamental chemical curing process, several techniques help achieve faster surface drying. Start by selecting the right product for your timeline. Fast-dry formulas specifically designed for quick projects can reduce waiting periods dramatically.
Increasing room temperature creates optimal conditions. Setting your thermostat to 75 degrees helps most sealants. Space heaters work well for small areas, but maintain safe distance to avoid overheating the material, which causes cracking or bubbling.
Improving ventilation removes humid air that slows acrylic latex drying. Open windows or run exhaust fans to create steady airflow. For silicone, moderate ventilation still helps by maintaining consistent temperature and preventing dust accumulation on the wet surface.
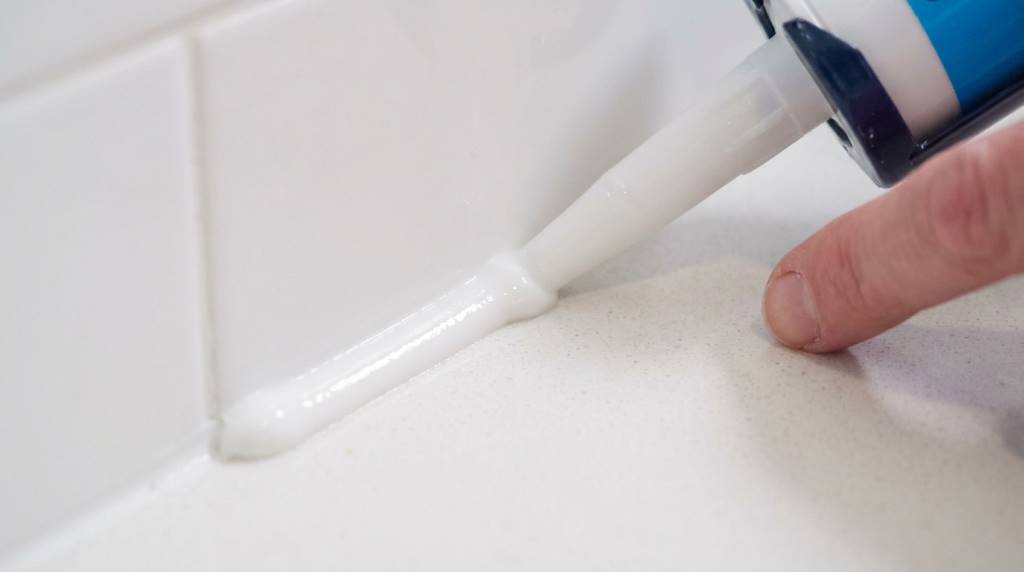
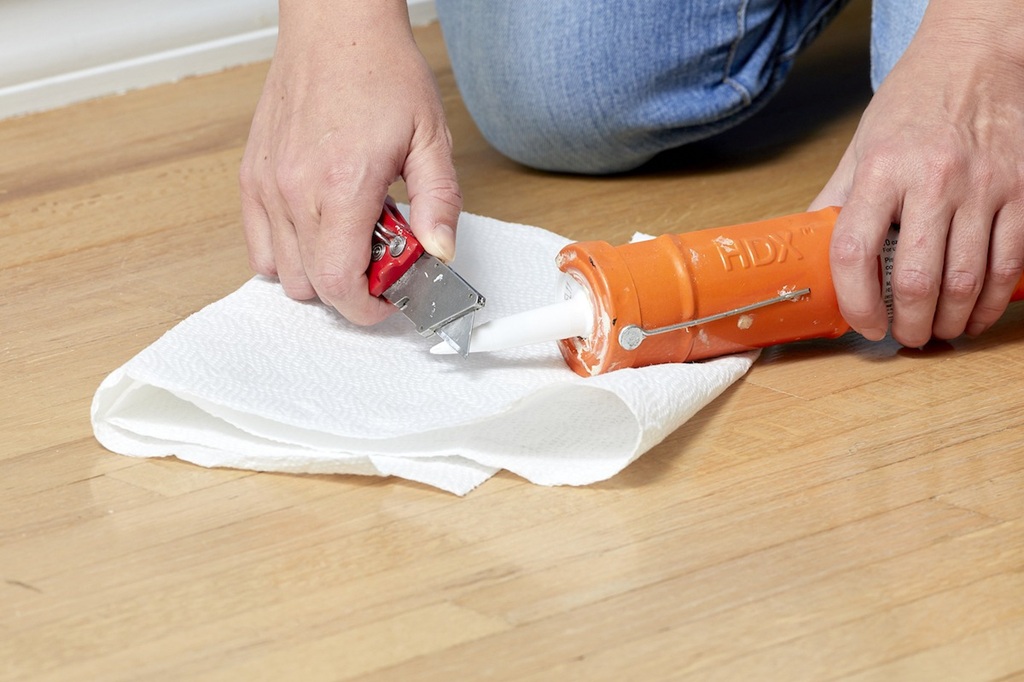
Applying thinner beads using proper technique makes a significant difference. Cut the tube tip at a 45-degree angle and create a small opening. Steady pressure produces an even bead that dries uniformly. Tool the sealant immediately with a wet finger or specialized tool to remove excess material and create a smooth, thin profile.
Using dehumidifiers in spaces where acrylic latex dries slowly helps considerably. Removing excess moisture from the air accelerates solvent evaporation. Conversely, if you’re working with silicone in very dry conditions, a humidifier can actually speed up the curing process.
Avoid touching or testing the seal prematurely. Each time you press the surface, you risk creating imperfections that require additional drying time to smooth out. Patience during the initial drying period prevents complications that extend the overall timeline unnecessarily.
When Can You Apply Paint Over Caulk?
Paintable formulas offer convenience for projects where appearance matters. Acrylic latex sealants typically accept paint within 30 minutes to two hours after application. The tube label provides specific guidance, but waiting longer than the minimum always produces superior results.
Testing a small section before painting the entire bead makes sense. Press your finger gently against the surface. If it feels firm and leaves no indentation, painting should proceed smoothly. Soft spots indicate incomplete drying, which causes paint to crack or peel later.
Pure silicone doesn’t accept paint well because its slick surface prevents proper adhesion. Hybrid formulas labeled as “paintable silicone” contain additives that improve paint bonding. These products combine silicone’s durability with the cosmetic flexibility of acrylic options.
Primer application sometimes helps paint adhere to challenging surfaces. However, adding primer extends your project timeline because it requires its own drying period. For most interior applications, quality latex paint bonds directly to properly cured acrylic latex sealant without additional preparation.
Temperature affects paint adhesion just as it influences sealant drying. Cold conditions prevent paint from flowing smoothly and bonding correctly. Warm, dry environments produce the best results when you’re combining caulking and painting in a single project day.
How Long Before You Can Expose Caulk to Water?
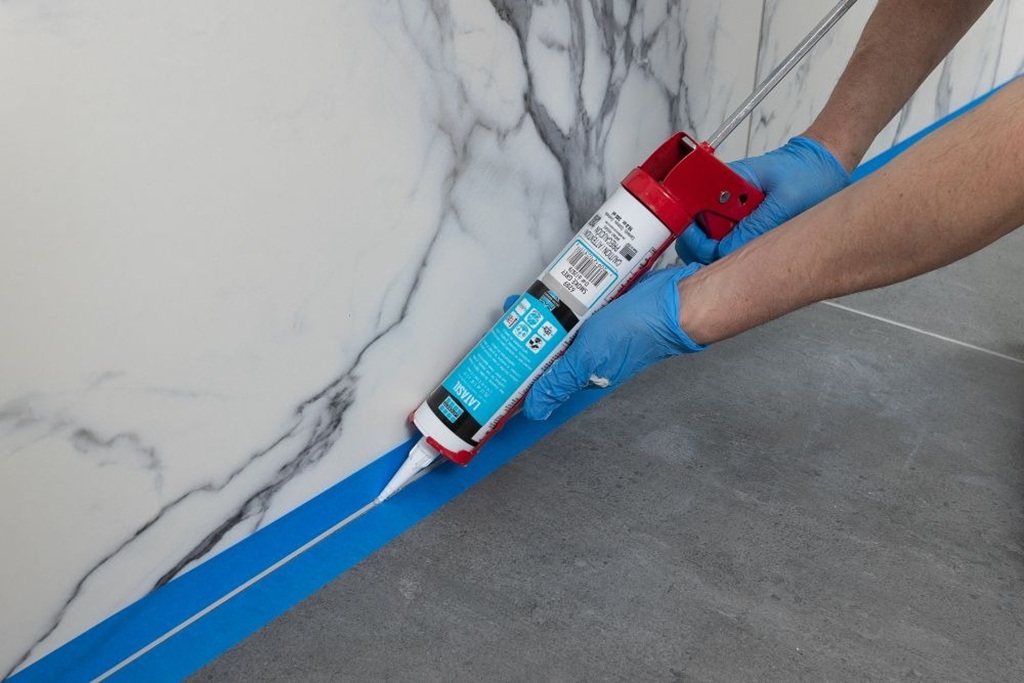
Water exposure represents the ultimate test for any seal. Most manufacturers recommend waiting at least 24 hours before allowing water contact, regardless of formula type. This period ensures the surface has dried completely and initial curing has progressed sufficiently.
Silicone sealants need the full 24-hour window even though they’re specifically designed for wet areas. Premature water exposure washes away chemicals before they bond completely. This creates weak spots that allow leaks and promote mold growth behind the seal.
Acrylic latex formulas require even more caution around water. While they might feel dry after a few hours, they lack silicone’s inherent water resistance. Waiting 24 hours minimum protects your work, but extending this to 48 hours provides extra security for areas with occasional moisture.
For showers and bathtubs, three days represents the safest timeline. This extended period allows the seal to cure deeply enough to withstand daily water pressure and temperature changes. The experts at This Old House recommend this conservative approach for bathroom applications.
Kitchen sinks can usually handle light water exposure after 24 hours, but avoid heavy use initially. Don’t fill the sink completely or run the garbage disposal for the first few days. Gentle use allows the seal to reach full strength without premature stress that compromises durability.
What Happens If You Use Caulk Too Soon?
Rushing to use a freshly sealed area creates multiple problems. The most immediate issue involves physical damage to the bead. Soft, uncured material shifts easily under pressure, creating gaps and uneven surfaces that compromise the seal’s effectiveness completely.
Water exposure before curing completes washes away bonding agents. This prevents the sealant from adhering properly to surfaces. You might not notice the problem immediately, but within weeks or months, the seal begins peeling away from the substrate gradually.
Premature stress also introduces air pockets and weak spots throughout the seal. These hidden flaws allow moisture to penetrate behind the bead, leading to mold growth, wood rot, or drywall damage. Repairing these secondary problems costs far more than waiting an extra day or two initially.
Temperature shocks prove especially harmful to uncured sealant. Hot shower water hitting a fresh silicone bead causes it to soften and sag downward. Cold air blowing directly on uncured acrylic latex might create surface cracks that spread as the material hardens over time.
Chemical exposure from cleaning products poses another significant risk. Many bathroom cleaners contain harsh ingredients that affect uncured sealant negatively. Waiting the full curing period ensures the material has hardened enough to resist chemical damage from normal cleaning routines.
How Do Different Caulk Types Compare?
Choosing the right formula often depends on balancing drying speed against performance characteristics. Acrylic latex wins for pure speed, drying in 30 minutes and curing within 24 hours. This makes it ideal for projects with tight deadlines or when you need to paint quickly afterward.
Silicone requires more patience but delivers superior durability and water resistance overall. Plan for one hour until surface dryness and 24 hours before water exposure. Full curing takes up to three weeks, but the result outlasts most alternatives in demanding applications significantly.
Polyurethane sealants fall somewhere between these extremes performance-wise. They typically need two to four hours for surface drying and three to five days for complete curing. These formulas excel in outdoor applications where flexibility and weather resistance matter more than rapid drying times.
Butyl rubber takes the longest, sometimes requiring several days for surface drying alone. This formula works best for outdoor applications where weather resistance trumps convenience entirely. Most homeowners avoid it for interior projects because faster alternatives perform adequately for those uses.
Hybrid formulas attempt to combine the best features of multiple types successfully. Modified silicone products offer faster curing than pure silicone while maintaining better water resistance than acrylic latex. These innovations provide middle-ground options when neither extreme fits your project needs perfectly.
Conclusion
Understanding drying times helps you plan projects effectively and achieve professional results consistently. Silicone formulas need 24 hours before water exposure and three weeks for full curing, while acrylic latex versions dry much faster but offer less moisture resistance. Temperature, humidity, and application thickness all influence how quickly your sealant becomes ready for use safely.
The key to success lies in matching the product to your specific situation accurately. Bathroom applications demand silicone’s durability despite longer wait times. Interior trim work proceeds faster with acrylic latex, especially when painting follows immediately. Reading product labels carefully and respecting recommended drying periods prevents failures that require costly repairs down the line.
For more home improvement guidance and maintenance tips, visit Homeplanidea where you’ll find expert advice on every aspect of keeping your home in top condition. Take your time, choose the right materials, and your seals will protect your home for years to come reliably.
Read More Also: How to clean windows inside and outside like a pro?
Frequently Asked Questions
Can you use a hair dryer to speed up caulk drying?
Using a hair dryer on low heat from 12 inches away can slightly accelerate surface drying for acrylic latex formulas. However, this technique risks creating a hard outer shell while the interior remains wet, leading to cracks. Silicone should never be heated artificially because it disrupts the chemical curing process. Natural airflow at room temperature produces more reliable results.
Does thicker caulk take longer to dry?
Yes, thick beads take significantly longer because the interior layers receive less air exposure. A properly tooled bead one-quarter inch wide dries much faster than a thick, untooled application. Excess material also increases the likelihood of cracking as solvents evaporate unevenly. Always tool sealant immediately after application to maintain optimal thickness.
Can you sleep in a room after caulking?
Most modern formulas release minimal fumes and allow safe occupancy after application. However, proper ventilation helps remove any odors and speeds drying. Silicone produces a vinegar smell that dissipates within hours. Low-VOC acrylic latex products create virtually no odor. Open windows for a few hours after application to ensure comfort.
Why is my caulk still sticky after 24 hours?
Persistent stickiness usually indicates environmental problems. Extremely cold temperatures below 50 degrees prevent proper curing. Excessive humidity slows acrylic latex drying, while insufficient humidity hampers silicone. Contaminated surfaces or expired products also fail to cure correctly. Check expiration dates and ensure ideal temperature conditions before reapplying.
Can you apply a second coat of caulk before the first dries?
Never apply additional layers over wet sealant. The fresh material won’t bond properly and creates weak spots prone to peeling. If you need a thicker application, wait until the first bead cures completely, then clean the surface and apply a new layer. This approach takes longer but produces far more durable results.
How long does caulk last once applied?
Properly applied silicone sealant lasts 10 to 20 years in bathrooms and kitchens. Acrylic latex typically performs well for 5 to 10 years in interior applications. Exterior formulas face harsher conditions and might need replacement every 5 to 10 years. Regular inspection helps you catch problems early and maintain effective seals.
What temperature is best for applying caulk?
Most products perform optimally between 60 and 80 degrees Fahrenheit. Temperatures below 40 degrees prevent proper curing and adhesion. Extremely hot conditions above 90 degrees can cause sealant to dry too quickly, creating surface cracks. Indoor climate control makes year-round caulking possible with consistent results.