






You’ve found the perfect recipe, measured your flour with a dry cup, and crossed your fingers. Yet your bread still turns out dense, or your cookies spread too thin. The culprit isn’t your skill—it’s your measuring method. Volume measurements are inherently inconsistent, and that inconsistency is the silent killer of good cooking. A reliable kitchen scale solves this problem instantly. But with dozens of options on the market, finding the best food scale for home cooks can feel overwhelming. This guide breaks down exactly what to look for, why precision matters, and how to choose a scale that genuinely improves your time in the kitchen without wasting money on features you’ll never use.
Key Takeaways
- Weighing ingredients in grams is significantly more accurate than using measuring cups, especially for baking and portion control.
- The best scale for most home cooks balances a 5 kg (11 lb) capacity, 1 g readability, and a practical tare function—without needing lab-grade precision.
- Look for a scale with a display you can actually read and buttons that respond to a light touch; these small usability details matter more than flashy specs.
- You don’t need a scale with a high price tag. Affordable models often outperform expensive ones in everyday usability and consistency, making price a poor indicator of quality.
- Consider how you cook: portioning meat, baking bread, and brewing coffee all have different ideal capacities and feature requirements.
Why Home Cooks Need a Scale More Than Any Other Tool
Baking is a science, but even savory cooking benefits from precision. A cup of all-purpose flour can weigh anywhere from 120 grams to 150 grams, depending on how it was scooped. A difference like that can alter the hydration of your dough, the texture of your cake, or the saltiness of your stew. Grams are grams—they never compress, settle, or vary by humidity. When you use a scale, you eliminate the guesswork that causes inconsistent results.
Portion control is another major reason. If you are tracking macros or just trying to eat reasonable portions, visual estimates are notoriously unreliable. Weighing your chicken, pasta, or peanut butter takes seconds and takes the guesswork out of nutrition. Plus, using a scale reduces dishes—you can mix, measure, and pour directly into the same bowl using the tare function, cutting down on extra measuring cups and spoons to wash.
There is also a practical financial angle. Baking by weight reduces wasted ingredients and failed batches. If you’ve ever thrown away a sunken cake or a brick-like loaf of bread, you know flour and butter aren’t cheap. A scale pays for itself quickly by reducing the number of outright failures in your kitchen.
For those just starting their search, finding an affordable and reliable model can be the deciding factor in whether you actually use it daily or leave it buried in a cabinet. Fortunately, a quality scale doesn’t need to be pricey. Many home cooks have found that the best food scale for home cooks combines essential features with a budget-friendly price point, proving that you don’t need to spend hundreds on a commercial unit to get accurate results in a home kitchen.
The Core Features That Actually Matter
Before clicking “add to cart,” it helps to separate the essential features from the marketing fluff. Here is what truly makes a difference in daily use.
Capacity and Readability
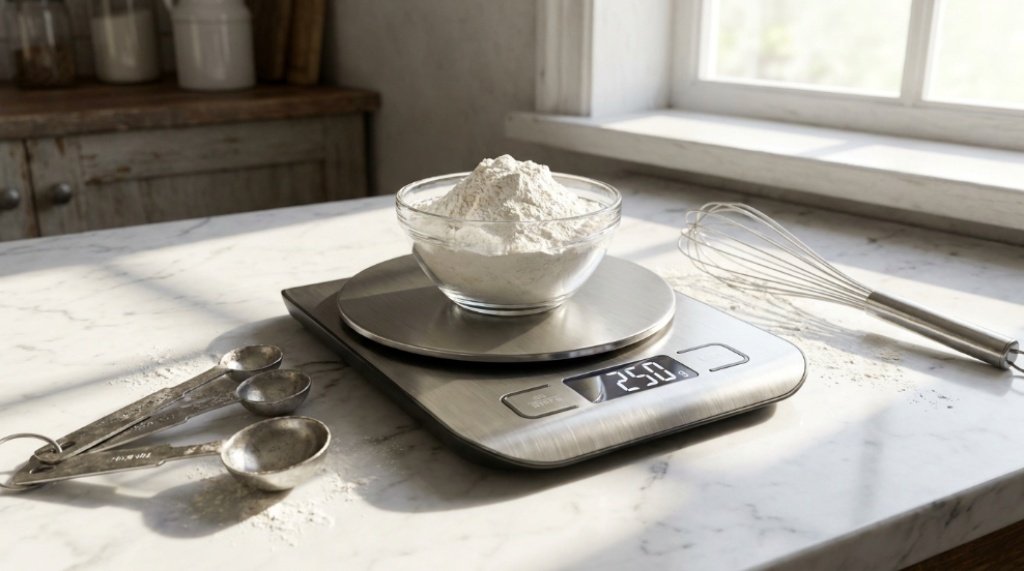
Capacity refers to the maximum weight the scale can handle, while readability refers to the smallest weight increment it can display. For a home cook, a capacity of 5 kilograms (about 11 pounds) is ideal. This size is large enough to weigh a whole chicken, a big mixing bowl of dough, or a large pot of soup ingredients. A smaller 2 kg scale may feel limiting when you’re cooking for a crowd.
Readability is where many people get confused. A scale that measures in 1 g increments is perfect for most cooking and baking. You do not need a scale that measures in 0.1 g increments unless you’re weighing spices in tiny quantities or making espresso (where half a gram matters). Scales with 0.1 g precision come with a lower maximum capacity, usually around 500 g, making them less versatile for general cooking.
The Tare Function: Non-Negotiable
The tare button (sometimes labeled “zero”) resets the displayed weight to zero. This allows you to put a bowl on the scale, reset it, add an ingredient, reset it again, and add the next ingredient without dirtying multiple bowls. It is the single most powerful feature for efficient cooking. A high-quality scale should have this button placed intuitively, so you’re not struggling to reach it with flour-covered fingers.
Readability of the Display and Buttons
A scale is useless if you cannot see the screen at an angle. Liquid crystal displays (LCDs) suffer from contrast issues when viewed from above or the side. If possible, look for models that have a larger display with high contrast. If you have a polished stone or metal countertop, be aware that some scales reflect glare, making a dim backlight frustrating. A backlit display is a worthwhile upgrade for darker kitchens.
Similarly, consider the button sensitivity. Some scales require a firm press, which can accidentally push the scale backward. Capacitive touch buttons (like those on a smartphone) are highly responsive and easy to clean, while membrane buttons may require more pressure. If you have arthritis or limited hand strength, a touch-sensitive button is easier to use.
Do You Need a Smart Scale?
Smart scales connect to your phone or tablet via Bluetooth or Wi-Fi, offering nutritional tracking and recipe integration. While they sound appealing, they often solve a problem you don’t have. Linking your scale to an app adds an extra step to food prep, and if the app doesn’t support your favorite recipes or track the metrics you care about, the connectivity becomes a gimmick.
For most home cooks, a simple digital scale is superior. It turns on instantly, responds immediately, and doesn’t require a firmware update or a phone nearby to function. The best smart scales on the market are fantastic for specific use cases—like meticulous macro tracking. However, they require daily app engagement, which often leads to the scale being abandoned when the user gets tired of logging every bite. If you do want app connectivity, ensure the scale measures in 1 g increments for food, not just 1 oz, and that the app has an extensive food database that is easy to search.
Material Considerations
The material of the scale isn’t just about looks; it affects longevity and cleanup.
Stainless Steel vs. Tempered Glass
Stainless steel tops are durable, resistant to scratching, and usually heavier. However, they are not necessarily non-slip; you will need the rubber feet on the bottom of the scale to do the work of keeping it stable. Tempered glass surfaces are easy to wipe down and look sleek on modern countertops. But glass can be more prone to breaking if dropped and can show smudges easily.
I recommend looking past the surface material and focusing on the seal between the top and the buttons or display. If you plan to weigh wet ingredients, visible gaps in the housing are where liquid can seep into the electronics and ruin the mechanism. A scale with a sealed control panel is much safer for daily kitchen abuse.
How to Test and Choose Your Ideal Scale

If you’re shopping online, you cannot physically test the scale. Here is a step-by-step approach to choosing the right model from a product listing or specification sheet.
- Read the manual for accuracy specs: Look for the phrase “1 g accuracy” or “readability: 1 g.” This is the measurement increment, not the overall sensor quality.
- Check the auto-off timer: Most scales shut off after 2–4 minutes to save battery. If you often step away from the counter while waiting for an ingredient, consider whether you need a scale that allows you to disable the auto-off feature.
- Look for the units button: Ensure the scale can easily toggle between grams (g), ounces (oz), and fluid ounces (fl oz) or milliliters (ml). While measuring water in ml is equivalent to grams, this feature fails for other liquids like oil or honey—you should weigh those in grams.
- Assess the size of the platform: If you frequently use wide mixing bowls, a smaller square platform may cause the bowl to tip. A scale with a platform that is at least 6×6 inches is more stable for large mixing vessels.
Affordability vs. Professional Grade
There is a wide gap between a basic $10 scale and a $99 professional unit. The professional units often feature higher capacity (15 kg or more), stronger sensors, and a “kitchen-friendly” IPX waterproof certification. Professional versions are built for high-volume use—restaurant kitchens—where they are dropped, overloaded, and wiped down with harsh chemicals hundreds of times a day.
For a home cook, that level of durability is unnecessary. Your scale might be used for 15 minutes a day at most. Therefore, you can safely prioritize a mid-tier or budget-tier model that still has positive reviews for consistency and battery life. Paying extra for a brand name rarely yields a change in day-to-day performance. You want a scale that works every single morning for your coffee and every weekend for your baking project, not a professional model with a high-powered sensor you will never utilize.
Maintaining Your Scale for Longevity
Even the best scale will fail if it isn’t maintained. Avoid leaving batteries in the unit for years; they can corrode and damage connectors. When the display dims, it is time to change the battery. Most scales use a single CR2032 coin-cell battery or a few AAA batteries. The CR2032 is common and powers a scale for many months, but it requires a small screwdriver to replace. If you want snap-of-the-fingers battery changes, pick a scale with standard AAAs.
Cleaning is another maintenance issue. Never submerge the scale in water. Instead, wipe the top with a damp cloth and mild detergent. If batter or dough dries on the top, use a slightly damp paper towel and gently scrub—avoid using steel wool or abrasive pads that will scratch the surface and create micro-grooves where bacteria can hide. Always dry it immediately and store it upright in a cabinet to prevent dust accumulation on the screen, To create a functional culinary workspace that matches your ingredient precision, check out our guide on how Tuscan Kitchen Design Supports Everyday Cooking to streamline your meal prep.
Common Mistakes When Using a Kitchen Scale
Even with a great tool, users make errors that ruin the results. Here are the most common pitfalls and how to avoid them.
1. Not Taring Between Ingredients
Forgetting to hit the tare button between ingredients is common if you are rushing. This results in a cumulative weight that is inaccurate and difficult to recover from. Always press tare immediately after adding an ingredient, even if you’re confident you have room in the bowl.
2. Using the Wrong Units
Setting the scale to oz and reading the recipe in grams (or vice versa) is easy to do. To avoid this, always double-check the units on the display after switching recipes. Many scales default to the last unit used, which can accidentally switch your yeast measurement from grams to ounces, resulting in a disaster.
3. Ignoring Leveling
If you’re baking on an uneven surface (like a tea towel or a wooden cutting board), the scale won’t read accurately. Ensure the bottom of the scale is clean and flat on the countertop. Uneven ground causes the strain gauge to bend irregularly, producing inconsistent readings.
Frequently Asked Questions
Is a food scale worth it for everyday cooking?
Yes. A scale is not just for baking. Portioning pasta, weighing meat, and ensuring you are adding the correct amount of salt to a brine are all tasks that benefit from a scale. It adds precision to your cooking and speeds up cleanup, as you need fewer measuring utensils.
What is the difference between a food scale and a coffee scale?
Coffee scales are optimized for low weight ranges, often measuring down to 0.1 grams for precise espresso shots. Food scales usually start at 1 gram. While you can pour coffee using a food scale, you cannot use a coffee scale to weigh a kilogram of potatoes. For most people, a general food scale is the more versatile purchase.
How do I clean my digital scale properly?
Use a damp, soft cloth to wipe the top. For sticky residue, use a small drop of mild dish soap on the cloth, not directly on the scale. Do not use abrasive cleaners or submerge the scale. Always dry it thoroughly after cleaning to protect the electronics.
Does temperature affect the accuracy of a kitchen scale?
Yes. Extreme temperature changes can cause expansion and contraction in the metal components (strain gauges) used to measure weight. Most scales are accurate between room temperature and 90°F (32°C). Placing a scale on a hot stovetop or near a cold windowsill may cause drift in readings. Let the scale acclimate to room temperature before use.
Conclusion
Choosing the right scale is less about buying the most expensive unit and more about understanding your specific routines. For most home cooks, a straightforward 5 kg model with 1 g precision is the perfect balance of versatility and usability. Look for a screen you can read, buttons that are easy to press, and a tare function that works instantly. Remember that the goal is consistency—if you can weigh the flour, butter, and water in grams every time, you will notice a dramatic improvement in your finished dishes. Ignore the high-tech marketing and pay attention to the essentials, and you will find a scale that serves you faithfully for years.